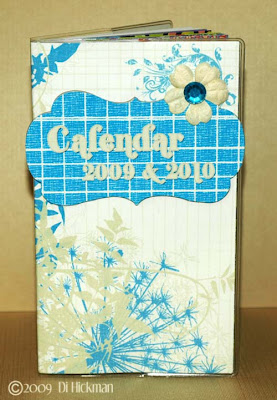
Prima Hybrid - altered
Tuesday, March 24, 2009
I have to say I ADORE the papers in this kit by Valerie! The designs are just beautiful, I've just been waiting for the right project to use them on. This project is one of those pocket/purse size calendars, I've simply added a new cover and a little of "me" to the look.

Stone Rose Hybrid card kit (digital) by Valerie Foster @ Prima Hybrid; Prima Fancies #1 by Valerie Foster @ Prima Hybrid;
Physical Products:
Chipmates Inkjet diecut stickers; Chipmates chipboard shapes; Fancie flower from "the bitty bag" #506988; center kisses round 9mm #520717;
Instructions
- Unfold the calendar and pop the full length cover (back and front) onto your scanner, and scan @ 300dpi (this saves measuring!)
- Using the marquee tool drag a box 1/4" larger than the cover, open a new layer and fill with white.
- Open stoneose_card04 from digital kit, drag onto document and resize to fit a front cover. Use a clipping mask to form to the box in step 2.
- Make a copy of stonerose_card04 layer, flip horizontally and use for the back cover.
- Add MixedFancies_02 from digital files, adding a blending mode: color (turquoise color-picked from stonerose_card-4), place in upper right corner
- Print onto cardstock and let dry & cut to size. Assemble cover of calendar
- Open stonerose_chipmates, using marquee tool drag a box around the item you want to use, then invert selection and delete. This will avoid printing the rest of the sheet when you only want to print ONE chipmate item.
- Add text to tag, print onto chipmate sticker. Let dry then adhere to chipboard chipmate
- Adhere chipboard to front of calendar, add prima fancie and center kisses!
- I adhered the chipboard to the front of the calendar ontop of the plastic cover otherwise it'd be too lumpy to get into the plastic cover.
- The top of the flower was hanging off the edge of the chipboard so I secured it with some pop-dots cut in half giving some support to the flower.
- Print your chipmate onto paper first, then check the color/text/placement etc is correct before printing onto the sticker sheets.
Di


1 comments:
ohhh Di that turned out awesome!!!
BTW...you've been TAGGED! Check out my blog for the details! :)
Post a Comment