The Prima Hybrid store has coordinating digital chipmates stickers for some of the paper lines so I thought I’d do a little tutorial to show paper peeps how to use the stickers to print just one sticker at a time. There are a few ways of doing this, but I am focusing on using digital editing tools. For this tutorial I am using Photoshop CS3 but the principle should be the same in all photo editing programs.
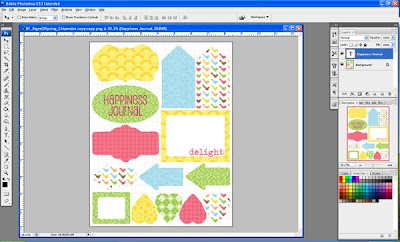
1. First open up photoshop and the chipmates sticker sheet you want to use, in this case I opened the “Signs of spring” chipmates.

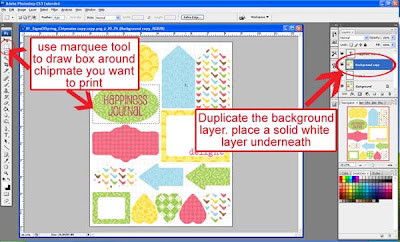
2. Add a new layer and fill with white (second layer in screenshot). Duplicate the background layer and move ABOVE the solid white layer. Using the marquee tool draw a box around the chipmate sticker you want to print.

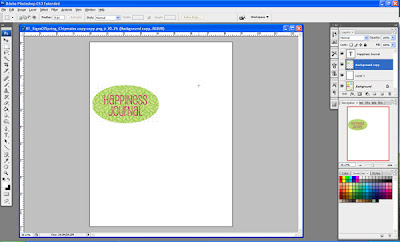
3. Next click, select, inverse (or right click, select inverse) and the selection should be inverted so all the sheet EXCEPT the area you wish to print is selected. Simply press delete to remove the excess printing area, leaving just the green sticker and text in this example.

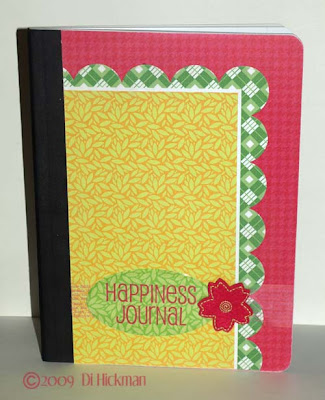
4. Print onto a chipmate sticker sheet, and use in your project


 Physical Prima Supplies: Signs of Spring papers; Clearly IOD transparency tape #517809; Loft 18 Flowers #52005 Signs of Spring epoxy overlay stickers; Chipmates Inkjet diecut stickers Digital Prima Hybrid Supplies: Signs of Spring Chipmates


0 comments:
Post a Comment